이번에는 서버에 Perforce를 설치해 사용해보자. Git이 언리얼 에셋을 효율적으로 다루지 못하는 거라면 속도가 빨라질 것이다.
설치
Perforce는 사용자가 쓰는 Helix Client(P4V)와 서버에서 돌아가는 Helix Core Server(P4D), 관리자용 프로그램인 Helix Admin(P4Admin)이 있다.
서버에서 Helix Core Server 프로그램이 돌아가면 Helix Client로 개발자 컴퓨터로 서버에 접속해 작업할 수 있다.
P4V 설치
일단 Vultr에 사용자 perforce를 만든다.
> useradd perforceVultr 서버에 P4D를 설치해보자. 윈도우로 다운로드 사이트에 들어간다.
Vultr의 운영체제인 우분투를 고르고 Download를 누르면 명령어를 통해 설치하는 방법을 알려준다.
Vultr에 ssh로 접속한 다음 설치한다.
Helix Core Server Administrator Guide (2023.2) (perforce.com)
그런데 주의사항으로 Perforce packaging key가 만료되어 apt-get으로 설치하기 전에 사전 작업이 필요하다고 한다.
- Perforce의 Packaging Key를 추가하고,
> wget -qO - https://package.perforce.com/perforce.pubkey | gpg --dearmor | sudo tee /usr/share/keyrings/perforce.gpg/etc/apt/sources.list.d/perforce.list에를 적는다. .gpg와 주소 사이에 엔터가 아니라 스페이스이다.deb [signed-by=/usr/share/keyrings/perforce.gpg] https://package.perforce.com/apt/ubuntu jammy releaseapt-get update를 해준다.
이제 helix-p4d 설치 명령어를 입력한다.
> sudo apt-get install helix-p4d서버 생성
그다음은 helix-p4d로 Perforce 서버를 하나 만들 것이다.
Helix Core Server Administrator Guide (2023.2) (perforce.com)
> sudo /opt/perforce/sbin/configure-helix-p4d.sh그러면 다양한 설정을 하게 되는데
- Service Name : Perforce 서버의 이름
- Server Root : Perforce의 파일이 저장되는 위치
- Unicode Mode
- Case Sensitivity
- Server Address : 서버 포트.
ssl:1666으로 설정한다. - Superuser login : 관리자 아이디 생성
- Superuser password : 관리자 비밀번호
이러면 다음과 같은 문구가 나온다.
::::::::::::::::::::::::::::::::::::::::::::::::::::::::::::::::::::::
::
::  P4D configuration has completed successfully.
::
::  Here is what has been done so far:
::
::  - Your p4d service settings have been written to
::    the following p4dctl configuration file:
::      /etc/perforce/p4dctl.conf.d/OOOO.conf
::  - The p4d service has been initialized with the P4ROOT:
::      /opt/perforce/servers/OOOO/root
::  - The p4d service has been started with the P4PORT: ssl:1666
::  - The p4d service has been set to Security Level 3.
::  - The new Perforce super-user 'UUUU' has been d and the
::    password has been set to the one specified.
::
::  Here is what you can do now:
::
::  - You can manage it with the 'perforce' user, using the following:
::
::      sudo -u perforce p4dctl <cmd>
::
::  - You can connect to it by setting the P4PORT and P4USER
::    environment variables and running 'p4 <cmd>'. For example, run:
::
::      export P4PORT=ssl:1666
::      export P4USER=UUUU
::
::      p4 login
::
::    For help, run:
::
::      p4 help
::
::  - To connect to this p4d service from another machine, include
::    this machine's name or IP address in the P4PORT. For example:
::
::      export P4PORT=ssl:{서버 주소}:1666
::
::  - For help with creating Perforce Helix user accounts, populating
::    the depot with files, and making other customizations for your
::    site, see the Helix Versioning Engine Administrator Guide:
::
::    https://www.perforce.com/perforce/doc.current/manuals/p4sag/index.html
::
::::::::::::::::::::::::::::::::::::::::::::::::::::::::::::::::::::::/etc/perforce/p4dctl.conf.d/서버이름.conf에 설정 파일이 있다고 한다.
파일을 열어보니 이런 파일이 나왔다.
#-------------------------------------------------------------------------------
# p4dctl configuration file for Helix Core Server
#-------------------------------------------------------------------------------

p4d 서버이름
{
    Owner    =  perforce
    Execute  =  /opt/perforce/sbin/p4d
    Umask    =  077

    # Enabled by default.
    Enabled  =  true

    Environment
    {
P4ROOT    =     /opt/perforce/servers/서버이름/root
        P4USER    =     관리자
        P4SSLDIR  =     ssl
        PATH      =     /bin:/usr/bin:/usr/local/bin:/opt/perforce/bin:/opt/서버이름/sbin

        # Enables nightly checkpoint routine
        # This should *not* be considered a complete backup solution
        MAINTENANCE =   true
    }

}
P4PORT가 빠져있어 추가해줬다. (다양한 오류를 겪었는데 이것 때문에 해결된 건지는 잘 모르겠다.)
#-------------------------------------------------------------------------------
# p4dctl configuration file for Helix Core Server
#-------------------------------------------------------------------------------

p4d 서버이름
{
    Owner    =  perforce
    Execute  =  /opt/perforce/sbin/p4d
    Umask    =  077

    # Enabled by default.
    Enabled  =  true

    Environment
    {
P4ROOT    =     /opt/perforce/servers/서버이름/root
        P4USER    =     관리자
        P4SSLDIR  =     ssl
        P4PORT    =     1666
        PATH      =     /bin:/usr/bin:/usr/local/bin:/opt/perforce/bin:/opt/서버이름/sbin

        # Enables nightly checkpoint routine
        # This should *not* be considered a complete backup solution
        MAINTENANCE =   true
    }

}
서버를 켜려면
> sudo -u perforce p4dctl start 서버이름끄려면
> sudo -u perforce p4dctl stop 서버이름확인하고 싶으면
> sudo -u perforce p4dctl status 서버이름을 해준다.
서버를 켜면 이제 Vultr에서는 P4D가 작동 중이고, 1666 포트를 통해 클라이언트 프로그램과 통신할 것이다. 1666 포트를 열어줘야 한다.
방화벽
Vultr 서버에서 1666 포트는 이중 방화벽으로 막혀있다. 하나는 Vultr 사이트에서 설정하는 Vultr 자체 방화벽이고, 하나는 현재 서버 컴퓨터의 방화벽이다. 둘 다 뚫지 않으면 접속할 수 없다. (이거 찾는 데 2시간이 걸렸다.)

Vultr의 방화벽은 Vultr의 서버 관리 사이트에서 설정할 수 있다. TCP 1666 연결을 추가해준다.
우분투의 방화벽은 ufw 명령어를 사용한다.
> sudo ufw allow 1666> sudo ufw status verbose
To Action From
-- ------ ----
22/tcp ALLOW IN Anywhere
1666/tcp ALLOW IN Anywhere
22/tcp (v6) ALLOW IN Anywhere (v6)
1666/tcp (v6) ALLOW IN Anywhere (v6)이제 서버 설정은 끝이다! 여기까지 수많은 삽질을 했다.
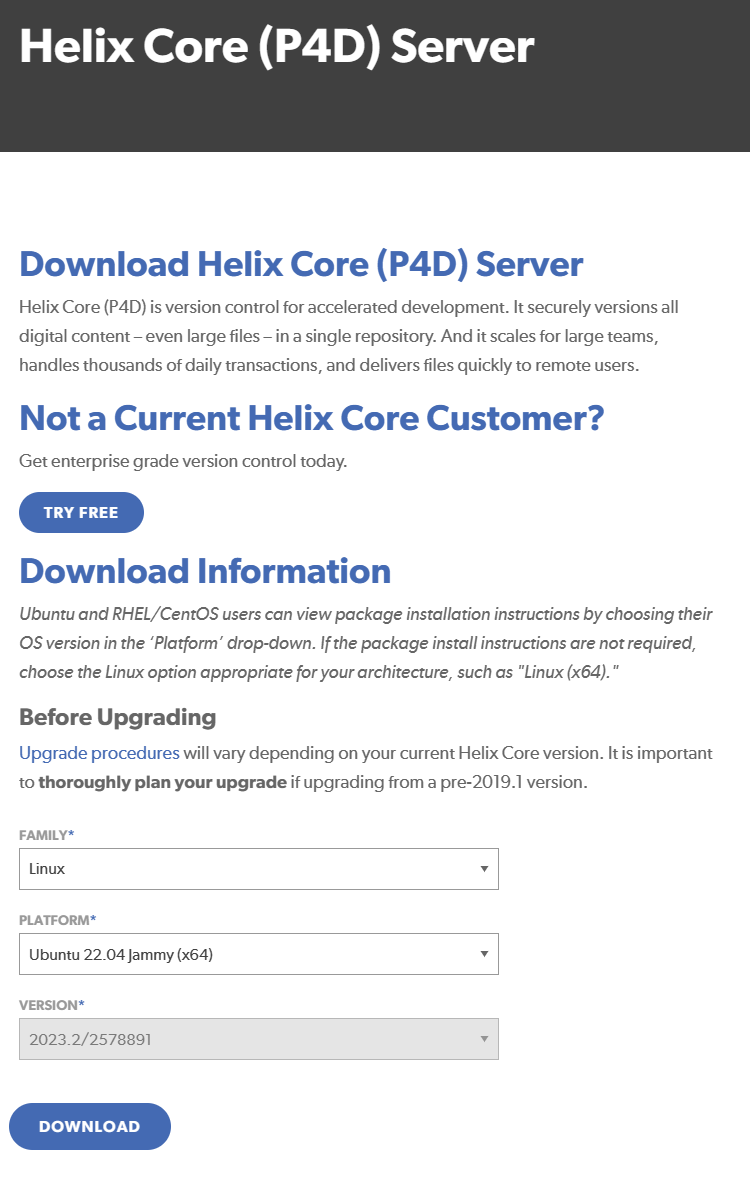
작업 컴퓨터에 P4V를 다운 받는다.
아마도 P4V와 P4Admin이 같이 받아질 텐데 우선 P4Admin을 켠다.
실행하면 로그인 창이 뜨는데
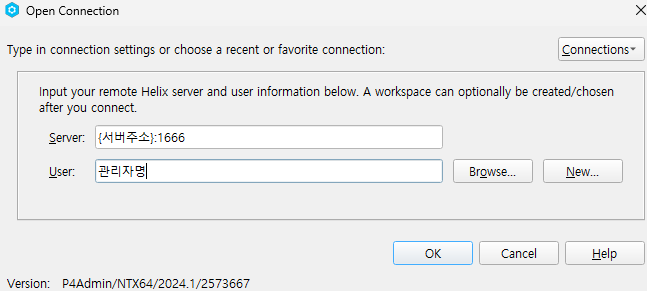
{서버주소}:1666과 아까 설정한 관리자명을 입력한다.

이런 창이 뜬다.
여기서 사용자를 추가하고 P4V에서 그 사용자로 로그인할 수 있다.
사용법은 아직 잘 몰라 일단 Workspace를 설정하고 README.MD를 Submit 하니 잘 보내진다.
결과
이것도 느리다...
서버 문젠가?
시간이 좀 줄어들긴 한 것 같지만, 여전히 1시간이 넘어간다.
결국 두 번째 방법인 Google Drive + Gitlab 투트랙을 사용하기로 했다.